How-to-Write-a-Novel-Getting-Organised-with-Great-Free-Software
Have you ever thought about writing a novel, or tried it?
If so, you've probably started with a 'bull at the gate' approach.
- You've probably sat down in front of your favourite word processor and tried to do it in one go, with little preparation.
- You have great ideas and you start throwing together words, plots, scenes, characters and various ideas into a document.
- You assume that this is the way the great novels were written
However this approach quickly leads to frustration and you end up in mess and you give up. Well this article will help to get you back on track to becoming a successful
writer.
Most people quickly realise that such an unorganised approach is doomed to failure and frustration. Its the same for writing any report, essay or article - you need to be organised - it will not just happen - it will not flow out, in one go.
How to Start - Get Organised


You need to develop an outline or concept, and a framework or structure, FIRSTbefore you start writing all the details.
How can you get organised, both in terms of organising your research material and developing the 'skeleton' or structure of your novel?.
The first thing you need is a way of collecting and organising your research material. You can do it with bits of paper, notebooks and folders, but there are better ways using computers.
Organizing your Research Material
If you are used to working with computers, there is a fabulous database software tool
called Treepad.
TreePad Lite (freeware) and the Asian languages version TreePad Asia, are tiny yet powerful personal database programs, that are only 600 Kb in size. You can easily store all your texts, notes, emails, hyperlinks, images, and everything you need into one or several databases. You can store all your research material and organise your drafts and notes with this tool including: browsing, editing, storing, searching and retrieving your data.
TreePad is very portable and can be run directly from a floppy, or thumb drive, including data, and so you can take it with you and use on multiple computers. To locate any article or snippet you previously wrote or imported, you can browse or search the tree. You can also use the inbuilt internal search engine to find any of your information, quickly and easily.
Although Treepad a database, you will be totally unaware of this when using the tool, because all data are stored in 'articles', which are slabs of text and nodes in your structure. You can make any tree structure you need and the structure is your creation! It is very easy to add nodes or articles to the tree, delete nodes and articles, move whole sub-trees around using 'drag-and-drop', etc. You can even copy/paste complete subtrees including all contained articles.
Although the program is small in size, it is very powerful and able to store thousands of articles. Each article can contain a large number of words, or a simple phrase. You can easily link to other articles using text hyperlinks. A TreePad data file can contain many megabytes of data. You can create and use any number of different TreePad data files.
Developing a Structure - Expanding and Refining a Concept
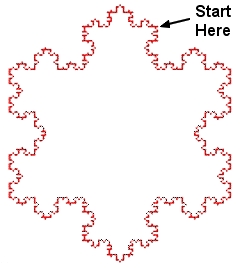
The 'bull at a gate' method of writing a novel is akin to trying to design a snowflake from scratch, starting from a single point and simply drawing it! This method doesn't work. There has to be a better way!
The best way to develop your novel is to develop an outline and framework and to successively develop the various components. You need a way of breaking the job down into a series of smaller tasks that you can fully focus on without losing the thread of the plot. You can only do this if you have developed the structure of your novel in outline form.
One of the best descriptions of this successive refinement approach is called the 'The Snowflake Method'. A good novel is designed; its structure does not just happen. Good Design is tough, so it's important to find a good method at the outset.

So how do you design a novel?
The key principle is to start with a simple concept, a summary if you like, the kernel of an idea, and then gradually add more elements and increase its complexity.
Steps of Design Using the Snowflake Method
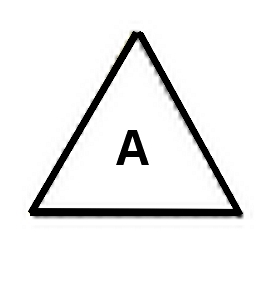
- Start by writing a one-sentence summary of your novel concept. This is the big picture, like the triangle (A) in the snowflake picture.
- Then expand that sentence to a single paragraph describing the story setup, major disasters, happenings, events and the ending of the novel. This is the second stage of the snowflake (B).
- Now you have a high-level view of your novel. Next you need to develop the storylines for each of your characters using a similar process to that described previously. Start with a simple character concept and then built up the details of your characters one at a time.
- The next stage involves full development of the characters. Write up a one-page description of each major character and a half-page description of their important characters. These "character synopses" should tell the story from the point of view of each character.
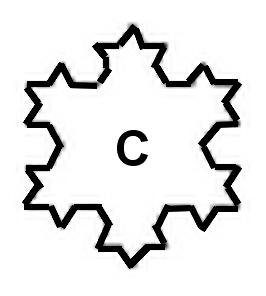
- At this point, you will have developed your story and will have several intertwined story-threads, one for each character. You are now at the third stage of your snowflake (C).
- You may find that you have to go back and modify your one-sentence concept or your single paragraph summary. This is a positive sign because it means your characters are taking charge of your story. It's always okay and good that at any stage of the design process to go back and revise earlier stages. Also remember that at this stage it doesn't have to be perfect. You have broken the task down into smaller elements that your work on individually and work back to integrate them into the story. Change is inevitable and healthy.The purpose of each step in the design process is to advance you to the next stage.
- The next step is to list of all the scenes that you'll need to turn the story into a novel. The easiest way to do this is with a spreadsheet, or specific purpose software, with one line for each scene. The advantages of the software approach is that you can easy reorder the scenes, add and delete some, and see their interrelationships in a storyline. You may end up with a list of 100 or more scenes for your novel.
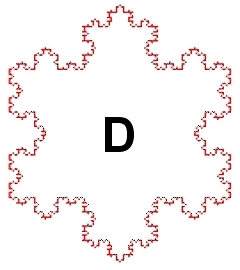
- Now you have developed a good structure and storyline you are ready to start the detailed writing of the real first draft of the novel (D).There are some excellent software tools to help you with this, including many freeware tools (shown below).
For more details of this 'Snowflake Method' including a commercial software package see Snowflake Pro.
Software Tools for Writing Your Novel
The best approach in selecting a writing tool is to choose a program specifically designed for novelists, and there are many products available for all sort so prices. These applications are a cross between a word processor and a database. You can develop scenes, plots, characters and various stories using a structure to your work so your material is organised and easy to find and modify. When you have a couple of free hours to work on your book, you can get started quickly and easily. Some programs even have schedules so you can plan the writing of your novel to meet various deadlines.
Among the commercial products available are New Novelist, WriteItNow, Storybase 2.0 and Power Structure.
There are also some fabulous free programs available as well.
Storybook
This open source software can make it easier to manage your plotlines, characters, data, and other critical information while penning a novel. Storybook is an open source novel-writing tool designed for novelists, creative writers, and authors which provides an overview of multiple plot-lines and helps you organise your material. You can store all information about your storylines, characters and locations in one place. You an manage scenes chapters, characters and locations, all in a tool with a simple interface.
Storybook comes with 3 separate views:
- Chronological View is used to view the scenes sorted by date.
- The Manage Scenes and Chapters View shows all your chapters with their various scenes. You can move a renumber scene using Drag-and-Drop.
- The Book View shows the chapters and scenes sorted by chapter and scene numbers. This shows you the storybook as you would read it in the final book.
Major features of Storybook
- Chapters: Define your chapters and assign scenes to them.
- Parts: Large projects can be split into well-arranged parts.
- Locations: Add, edit or remove locations and assign them to scenes.
- Characters: Add, edit or remove characters and assign them to scenes.
- Spell Check: Your text can be checked for spelling. New words can be added to your personal user directory.
- Strands and strand links: Each scene belongs to a primary strand. Optionally, other related secondary-strands can be linked to a scene.
- Information: A hierarchic tree shows all characters, locations, chapters and strands. If scenes are missing or exist twice, a warning informs you.
- Storybook helps you to keep an overview, especially helpful for complex stories with two or more plot-lines (strands). Imagine it as a kind of a "dynamic mind map".
- Instant save: Because Storybook uses an embedded database called H2 to store data (and not a file) each input entered is saved in an instant. Even if the program crashes, you won't loose any data.
- Adjustable view: All views can be re-sized to fit to screen or to get a better overview. Even more working space is available if you hide the information panel with a simple click on the tool bar.
- Task list and Navigation: The task list shows all scenes with a status other than "done". With the "Go to date" respectively "Go to chapter" navigation you can easily jump to the desired date or chapter-number.
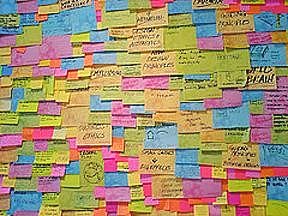
- Global Ideas: While writing authors have all kind of ideas that come up suddenly. No more Post-it needed! With the "Global Ideas" feature, you can save your ideas anytime and assign them to the levels "Not started", "Started", "Completed" and "Abandoned".
yWriter
yWriter focuses on scenes instead of chapters. A scene is an easy element to work on - its small and well-defined. You can work on a scene and insert them into your novel. You can also drag and drop them from one chapter to another as your book develops.
yWriter helps you with the development of your plot and your overall design goal. It can instantly generate various reports from your scene and chapter summaries. These reports can range from a brief scene list to a comprehensive synopsis. It can also help you develop a work schedule for your novel showing what you have to do to meet your deadline, be it for the outline, the first draft or various later stages.
Major Features of yWwiter
- Multiple characters per scene.
- Automatic chapter renumbering.
- Re-order scenes within chapters.
- Organise your novel using a 'project'.
- Storyboard view, a visual layout of your work.
- Drag and drop of chapters, scenes, characters, items and locations.
- Viewpoint character, goal, conflict and outcome fields for each scene.
- Display the word count for every file in the project, along with a total.
- Add chapters to the project.
- Add scenes, characters, items and locations.
- Saves a log file every day, showing words per file and the total. (Tracks your progress)
- Saves automatic backups at user-specified intervals.
- Allows multiple scenes within chapters
PageFour
PageFour is specifically designed as a dedicated writing organiser for creative writers.
Major Features of PageFour
- Work on 3 or 4 novels at the same time.
- Organize your work in a way that suits you.
- Scan your work for over used words and phrases.
- Simple Searching across Notebooks - no more Windows Search.
- Take Snapshot Copies as you write, and automatic archives every few days.
- Character summaries, plot outlines, chapters and notes, all at your fingertips.
- Print your manuscripts in a range of fonts and formats - without changing any documents.