Unleaded Lead Lighting - Fusing Stained Glass for Windows, Panels, Lamps
Shhhh! This is a trade secret!
You can glue glass to glass to make a wonderful range of new lead lights designs for windows and lamps without using lead strips or copper foiling. Yes, you Can!!
Will they fall apart - No way! If it is done properly! Windows and lamps made this way have been is use for more than 30 years!!!
Glass to glass bonding is a technique that has been used for more than 30 years for conserving, repairing and restoring glass exhibits in museums.
Now you can use it to make unique designs.
This article will show you how it is done and some design concepts.

Elements of Design - Its Unleaded - No Lead means no Lines
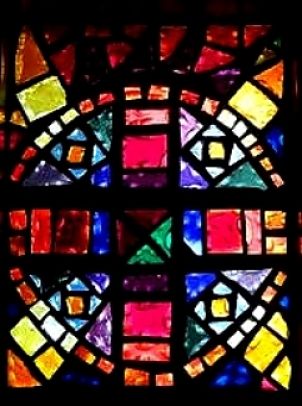
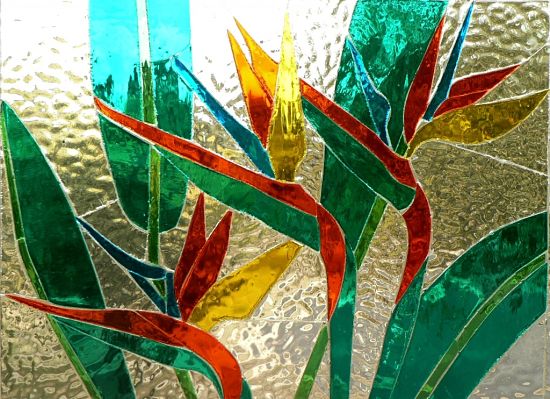
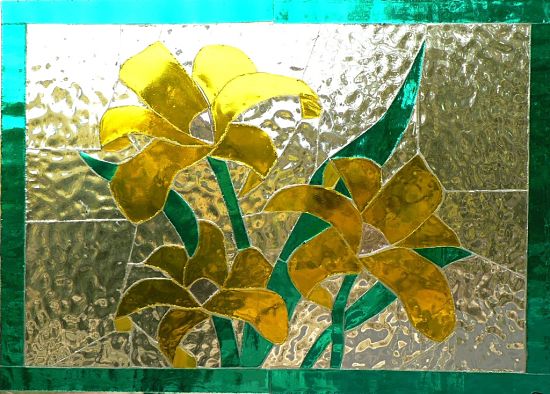
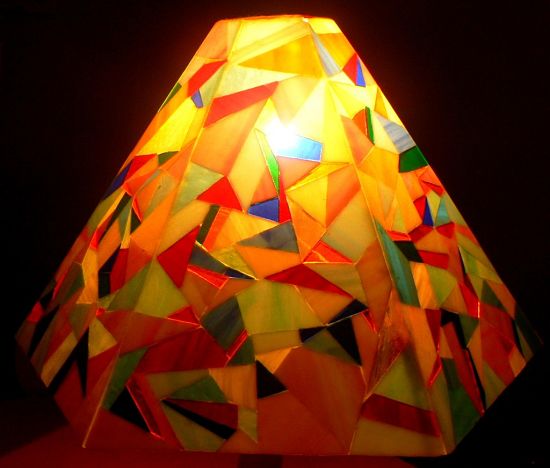
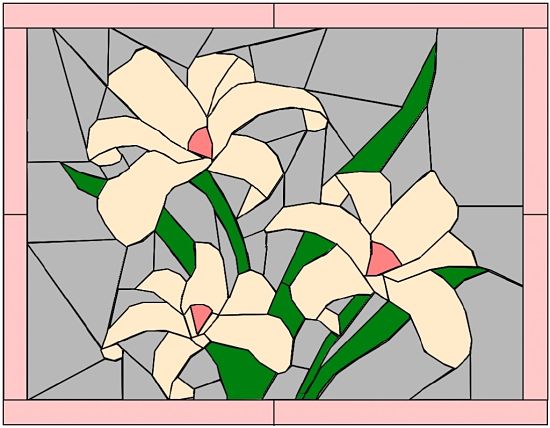
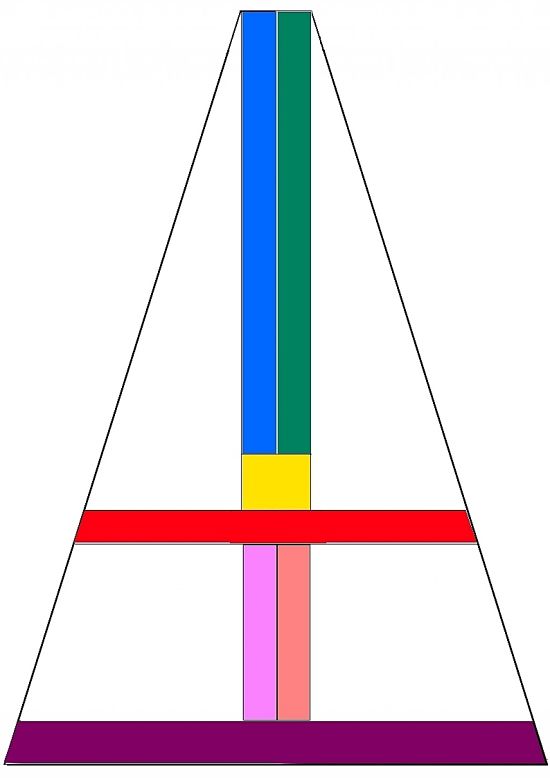
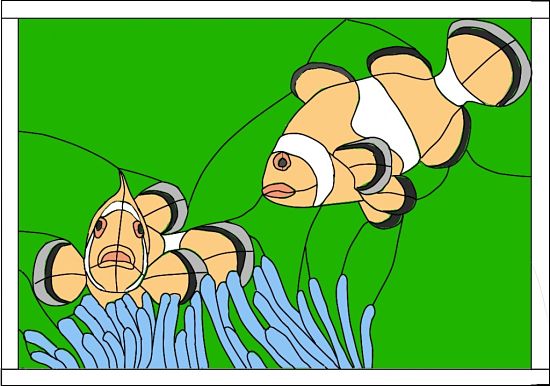
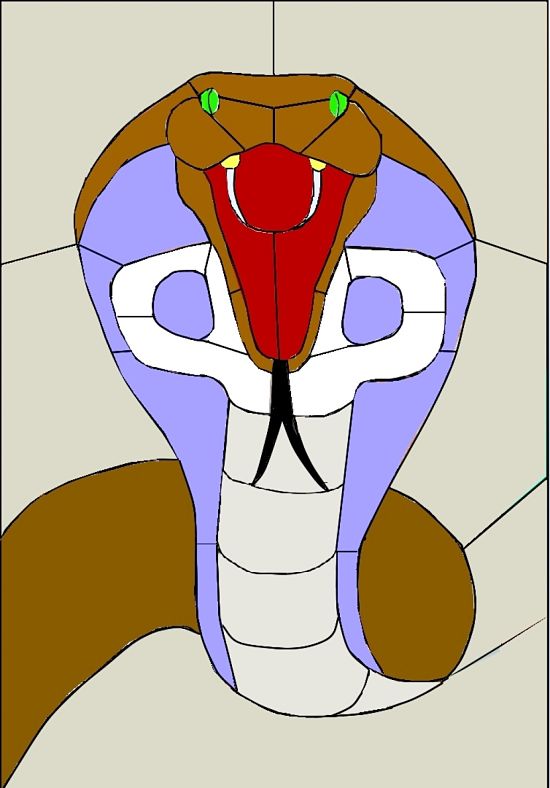
The method is ideal for lamps and panels and also for large windows. As shown in the small panels the design
concepts are totally different. With conventional lead lighting the design is dominated by the lines -
the lead strips and the copper foil and solder lines. The coloured glass simply fills the space between the lines. With bonded glass
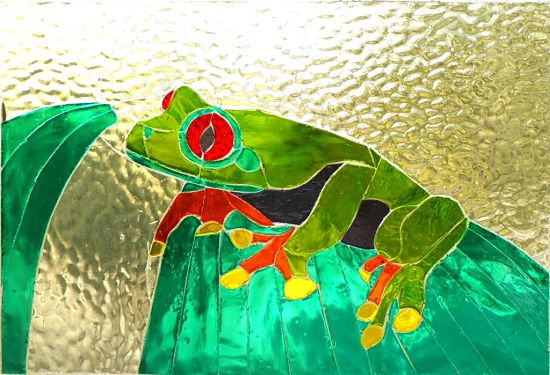
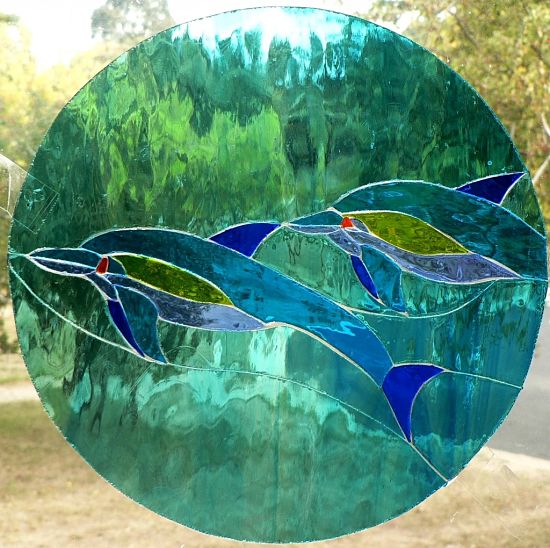
the lines are gone - in fact they become invisible. The idea is that the glass pieces float in space like natural objects -
there are no lines around the petals of a flower in nature. The idea is to simulate nature.
As with all stain glass design -
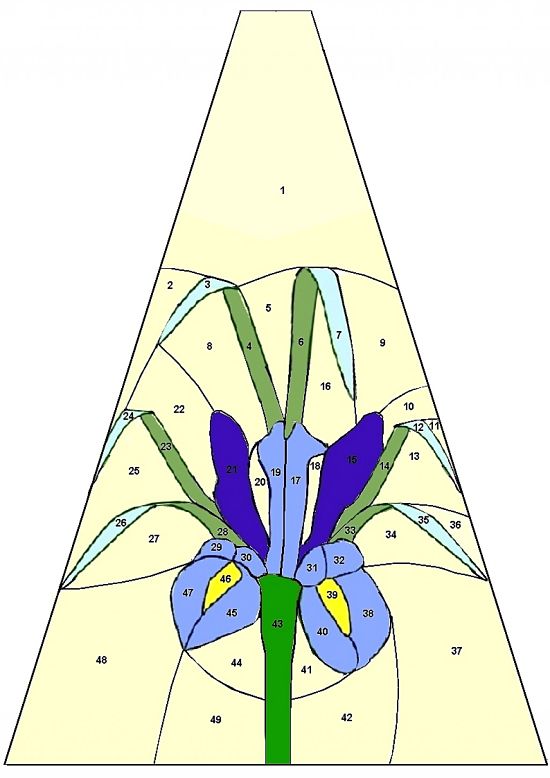
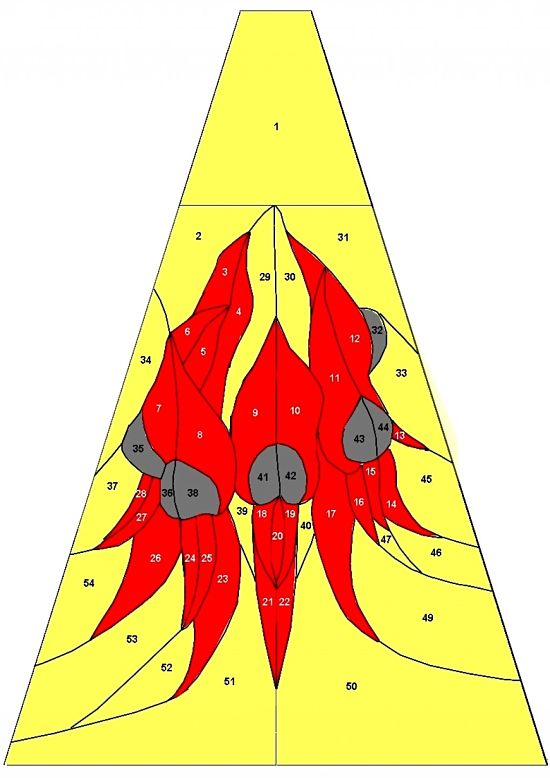
the skill of the designer is to ensure that all the pieces can be cut from a piece of glass. Ensure you don't design the impossible
(but you can always do it in two or more pieces and so all is not lost). Some examples of the designs are shown in the images.


Cutting the Glass
These design require ultimate skills in glass cutting - you can no longer hide your errors under the lead.
Every edge - that is EVERY EDGE has to be ground using a grinder unit otherwise the glue will not stick.
The best way to proceed is to print the design and then stick it onto cardboard or plastic media and to cut around each piece. The numbers on the design will help you to re-assemble the pieces for the windows, panels or lamps. Use colors on the design to help you select the glass for each piece. Trace around the piece onto the glass sheet and cut the glass about 1mm inside the line. Multiple cuts will be required for complex pieces. Then grind the edges so that the piece perfectly matches the template.
Assembling the Pieces
Start with a laminated copy of the design. Build a frame for the shape of the panel and place the design underneath. Then add the pieces to the frame, making sure they fit the design underneath. Extra grinding will be required to make all the pieces fit together. As you go use transparent sticky tape to hold the fitted pieces together.
Preparing for Gluing
Stick all the pieces together with adhesive tape. Flip over the assembled panel or lamp face. Clean the surface with alcohol or methylated spirits.
What Glue to Use
The secret bonding agent is a good quality two-part epoxy glue. Don't use the quick set (5 minute) variety. The types available in hardware stores or marine supply shops are suitable. The various other glass bonding agents don't appear to work long term and are too expensive. Specialist glass epoxies are available but they are very expensive and difficult to obtain. The next secret is HEAT - you have to apply heat! Epoxy glue loves heat and applying heat to temperatures of 40-70 degrees C (100-160 degrees F) is crucial for a permanent bond. In Australia I use Sellys Araldite (two part slow set general purpose glue), marine epoxies also work well. Do some tests with local glues to make sure that the bond is permanent.
Remember that ALL THE SURFACES MUST BE ROUGHENED BY GRINDING - and HEAT is vital. Bond several pieces together as a test. You will know when the bond is strong and secure when the glass breaks before the bond. With heating, the glue will set in an hour or so, but allow 24 hours for complete setting.
Heating
You can use an old oven set on very low heat (less that 100 degrees C ; 212 degrees F). A laboratory drying cabinet is ideal. Or you can simply make your own hood or heating oven by building a box cover from wood or other materials. Simply slip a small fan room heater with a thermostat inside and you will have a good heater. The temperatures are not very high and the thermostats will prevent overheating. But never leave the heating oven unattended for extra safety. The box can be made to suit the size of the job. You can even build a light weight heating hood that can be placed directly over your work on your bench.
Gluing the Panels
Before gluing the clean panels, heat them up first. This helps the glue to flow and penetrate. Mix the two parts of the glue in the correct proportions. Carefully apply the glue along each of the joints using and plastic spatula to squeeze the glue into the joint and to remove any excess glue. Wipe off the excess using a cloth soaked in a solvent such as methylated spirits, but make sure the cloth is only damp, not wet. Otherwise you could flush the glue out of the joints. It is important to wipe off the excess glue.
Place the pieces in the heating chamber for an hour or so to allow the glue to set. All 24 hours at room temperature for complete set, but the panels will be very strong after an hour. The bonds are permanent - my lamps and windows have been is use for 30 years!
Clean up and Assembly
Simply remove the adhesive tape. Check for any gaps caused by bubbles. To fill these simply apply tape to the other side and apply more glue and re-heat. Once you have completed all the panels for the lamp, the lamp itself can be assembled using copper foiling or by gluing and heating.
Care and Maintenance
When done properly the glued joints are stronger than the glass itself and there is no ongoing maintenance. Glass is fragile and requires care, but the bonds are stronger than the glass itself.
Reduced Hazards from Toxic Lead
Lead is toxic. There has been a lot of concern about the hazards of lead and soldering used for copper-foiling is particularly hazardous. Epoxy glue is a hazard and you should always wear gloves and ensure adequate ventilation. The hazards from epoxy are probably much less than for lead used in conventional lead lighting.
ENJOY!
Postscript: Thirty years ago I went along to a lead lighting class. After a few nights I told my teacher that I wanted to do it without lead - unleaded; without lines in the design. He thought I was mad. I came back the next night with a glued test panel and asked him to attempt to break it. He broke it, but every break occurred in the glass itself. He still thought I was mad! Unleaded Lead Lighting!
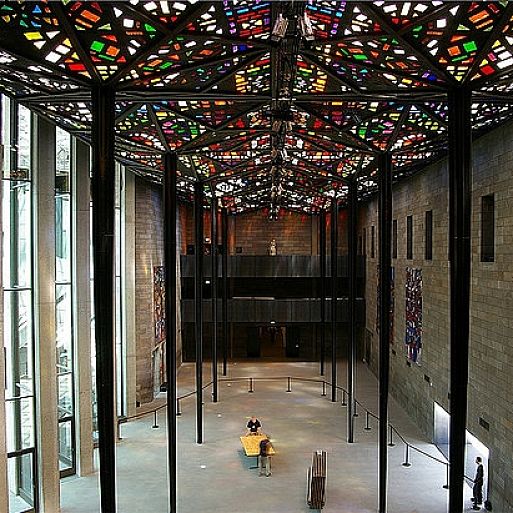
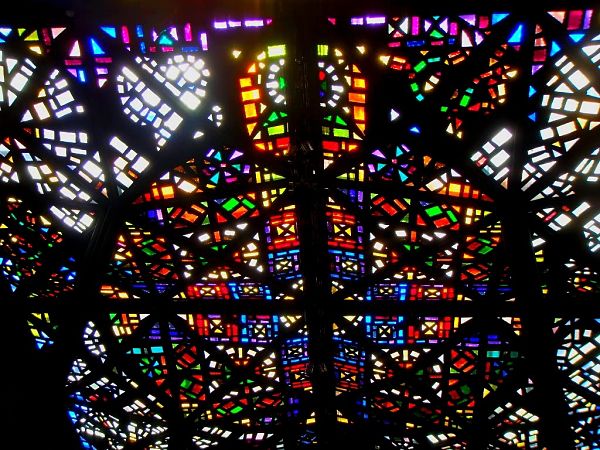
My inspiration is Leonard French (glass suspended in concrete) - one day I will have entire walls of stained glass - without the lines!